Introduction
Some Oracle Cloud application require to send e-mails to you or your users. For example to send reports or notifications. Those (SaaS) application usually do not have access to your local SMTP server or the possibility to use another SMTP server but the one OCI. In this blog I will walk you through the configuration of configuring your OCI tenant to be able use its SMTP functionality.
Gathering the information
First we will gather the information of the SMTP server in your tenant. You can find those in your OCI tenant. Navigate in the menu in the upper left corner to Developer Services –> Application Integration –> Email Delivery. The on the left side click Configuration. Here you can see the SMTP Sending configuration. In this case; the region is eu-frankfurt-2 which is part of EU Sovereign Cloud.
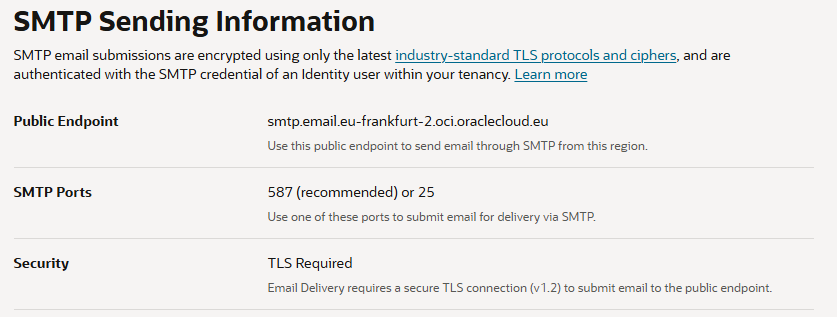
So we have the SMTP information, but you cannot use just this information. There are three more steps we need to take.
- Tell the SMTP Server which mail addresses are allowed to send e-mail (approved senders)
- Create a user with SMTP credentials to authenticate against the SMTP server of OCI
- Make sure the IAM policies are in place.
Let’s start with the first one, approved sender.
Configuring approved sender
Navigate in the menu in the upper left corner to Developer Services –> Application Integration –> Email Delivery. On the left side click Approved Senders. Here you can configure all the mail addresses that are approved the send e-mails using the SMTP server (From: addresses). You can add multiple addresses.

You can also configure them with Terraform using this resource block:
resource "oci_email_sender" "approved_sender" {
  compartment_id = var.compartment_ocid
  email_address  = var.email
}
SMTP credentials
In order to authenticate against the SMTP server we need to make sure there is a user with SMTP credentails. Best practice is to create a service account in the default domain which is only allowed to have SMTP credentials.
Navigate in the menu in the upper left corner to Identity & Security –> Identity –> Domains. Select the default domain in the root compartment. Go to User Management and click Create User.
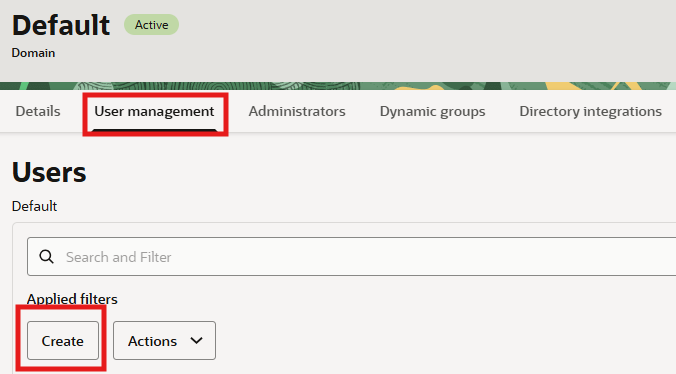
Give it a name and username/ mail address.
As soon as the user is created you will see all the details of the user. Now we set the permissions for that user. Click in the right upper corner on Actions –> Edit User Capabilities.
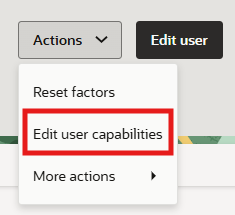
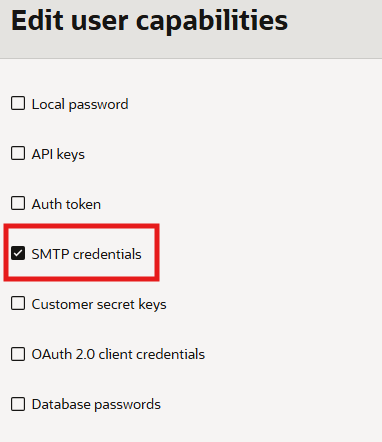
The next screens appears. Disable everything except SMTP credentials. When done, save the changes.
Now go to SMTP Credentials under the details of the user. Click on Generate credentials. Provide a description and save. Write down the username and password.
Note! You will be able to safe the password one time! If you lose it, you need to create new credentials!
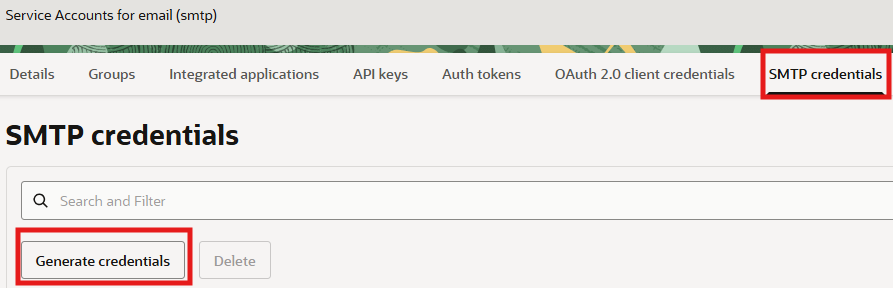
Now you created the credentials.
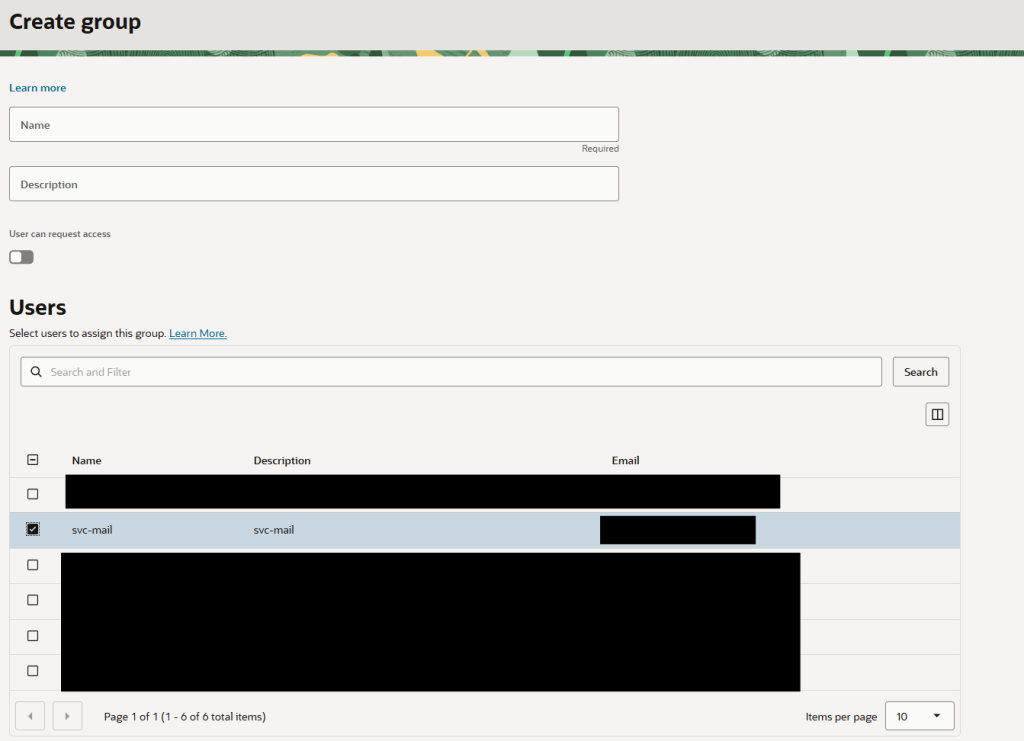
Now we need te create a group for this service account and put it in the group as we need it for the next step: IAM Policy.
Navigate in the menu in the upper left corner to Identity & Security –> Identity –> Domains. Select the default domain in the root compartment. Go to User Management and click Create Group. Give it a name, description and select the just created user to add to the group.
IAM Policy
Now we need to give the users in that group permission to use the smtp functionality in OCI. We can do that by adding a IAM policy to the root compartment.
Navigate in the menu in the upper left corner to Identity & Security –> Identity –> Policies. Make sure you are in the root compartment. Click create Create Policy.
Give it a name and description. Then click on Show Manual Editor and add the following line:
allow group [groupname created] to use email-family in tenancy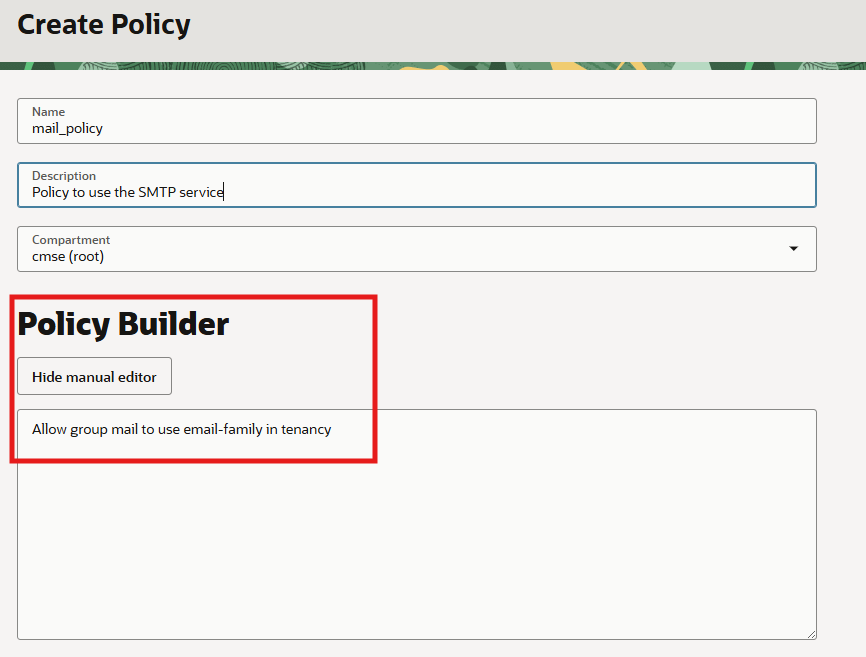
When finished click Save.
This all the configuration needed for your application.
Bring the smtp server URL and the username/password when configuring the mail server and you should be good! And make sure you send your mails from the email addresses configured in Approved Senders 😉
See you next time!